Starting the ISTA Client
How to start the ISTA Client
1 Double-click the symbol on the Windows desktop (if displayed) ; or
2 or
3 Open the application in the program file by selecting “Start – All Programs – ISTA – ISTA Client”;
4 or
5 Open the application by selecting the corresponding entry on the central start page on the ISID.
After selection, the start mask appears (Chapter 3.1). A list of news will be displayed. You can set the display period in Administration.
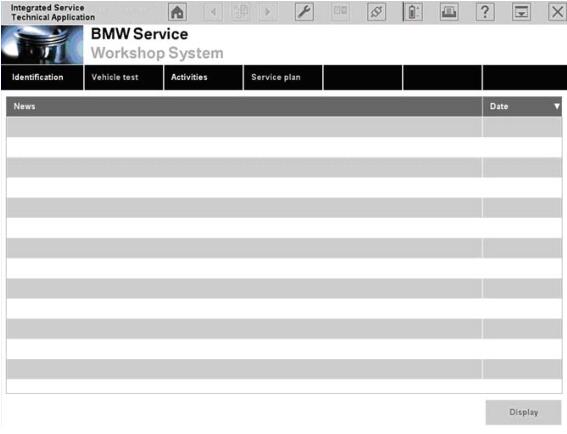
If the date has changed since the last time the system was activated, the BMW Diagnostic Software “ISTA usage notes” will be displayed. After reading the note, close the popup window by clicking the “Continue” button. You can initiate an identification procedure from the start mask.
Checking the operations list
After you have selected the “Identification” menu from the start mask, the workshop system switches to the “Operations list” tab.
Each identification session generates a “procedure” that is automatically initiated and administered by the workshop system for vehicle identification. At the end of the session an operation is closed via a popup. The user can thus choose whether he wants to terminate or interrupt the operation. Depending on the option selected, an operation is concluded via a popup, assigned a status (“terminated”, “interrupted”) and entered into the operations list for a certain period. Saved procedures can be reopened from the operations list Additional information is available in Chapter 3.2.1.1.
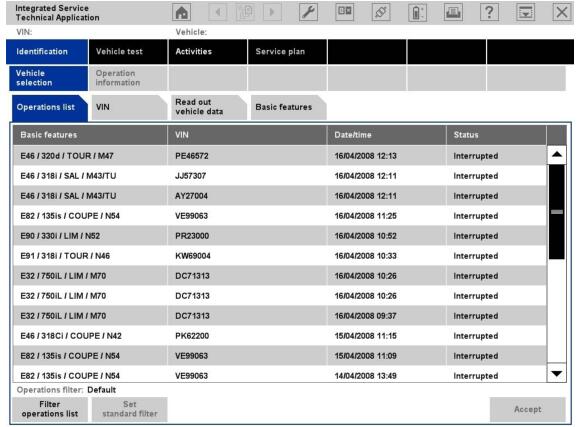
The selection of an existing procedure is not suitable for the “Short introduction” provided here. Therefore change to the “Read out vehicle data” tab.
Selecting a vehicle
There are four options for initiating vehicle identification (Chapter 3.2):
* by selecting an operation
* by entering a vehicle identification number
* by reading out the vehicle data, or
* by selecting basic features.
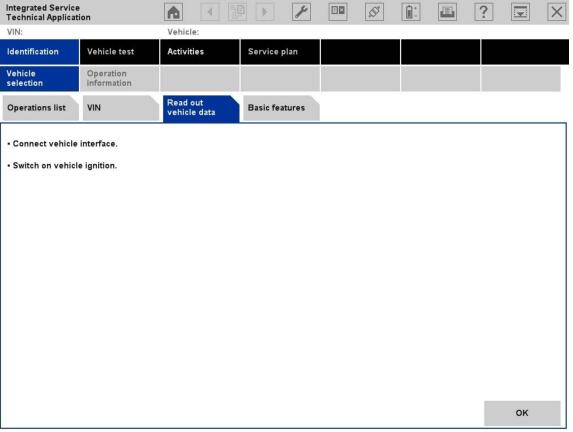
* How to identify a vehicle by reading out the vehicle data and automatically creating an operation to do this:
* Click the “Identification” main menu item in the navigation area.
* Select the “Read out vehicle data” tab and follow the instructions provided.
Selecting a diagnostic connection to the vehicle
The ISTA communication devices from the HO workshop are entered into the content range of the connection manager.
* How to select the communication device:
* Determine which BMW ICOM A2 is connected to the vehicle to be identified.
* Select the appropriate components in the connection manager and click the “Set up connection” button.
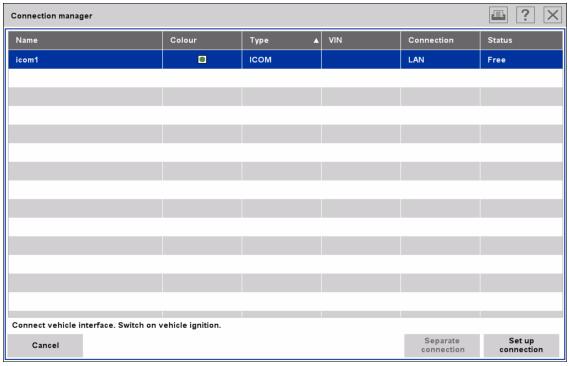
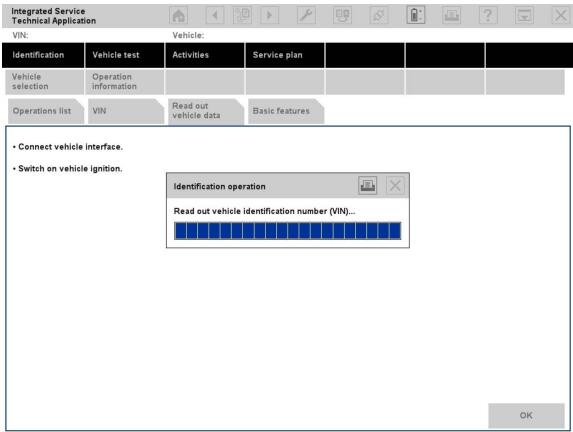
After the “Set up connection” button is selected and clicked, the connection will be set up. The tester performs a vehicle identification. To do this, it reads out the vehicle identification number from the vehicle. The progress of the identification procedure is displayed on a progress bar.
After the identification procedure, the workshop system tries to uniquely assign the operation to an existing operation. If this does not succeed, it automatically creates a new operation and switches over directly to the “Operation details” mask (Chapter 2.6). If operations with the same identification features are already available in the workshop system, these will be offered for selection in the “Assignment/generation of operation” list.
Creating an operation
After the identification procedure, the workshop system tries to uniquely assign the operation to an existing operation. If this does not succeed, it automatically creates a new operation and switches over directly to the “Operation details” mask (Chapter 2.6). If operations with the same identification features are already available in the workshop system, these will be offered for selection in the “Assignment/generation of operation” list. Click the “OK” button.
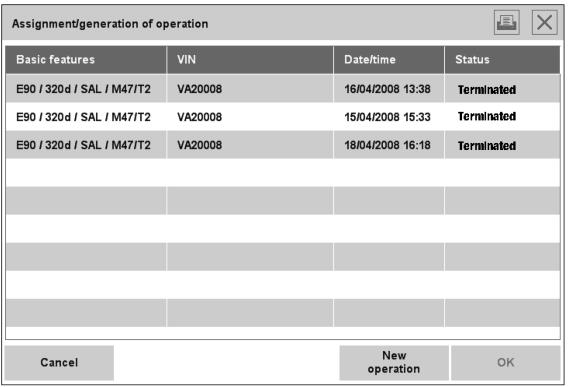
How to assign an operation:
* Select an existing operation or click the “New operation” button.
* Click the “OK” button.
If no unique assignment is produced (e.g.: the other operation is open or several suitable operations are available), a corresponding popup is displayed.
Finding out about operation details
After automatic vehicle identification and manual operation assignment, you will obtain general information on the vehicle in the “Operation details” mask (Chapter 3.2.2.1). In this mask you can perform a vehicle test or look for information.
Click the “Perform vehicle test” button.
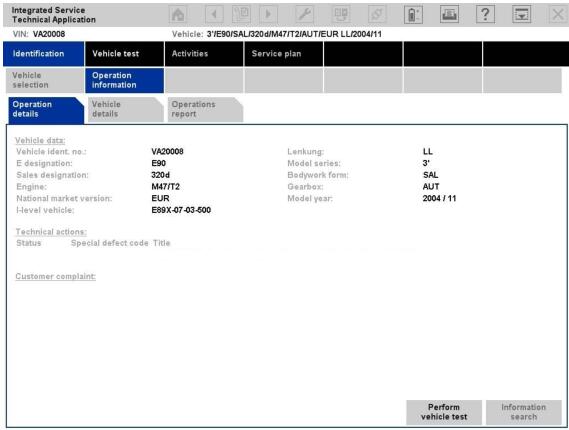
Operation details for “Technical actions” and “Customer complaints” require an online connection to BMW AG.
You can specifically search for various types of information via the “Search for information” button
You can start the vehicle test by clicking on the “Perform vehicle test” button.
Perform vehicle test
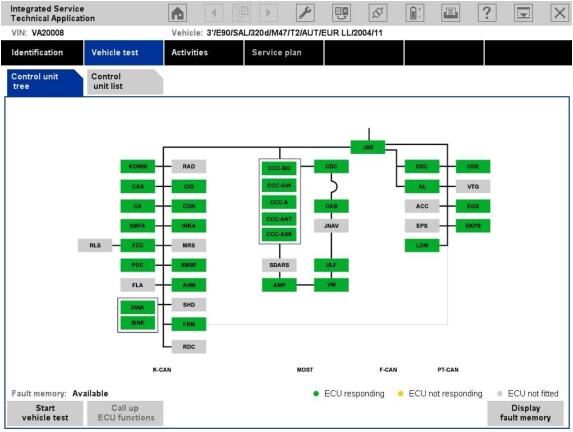
The vehicle test runs automatically the first time for each operation. During the vehicle test, the “Control unit tree” submenu (Chapter 3.3.1) is displayed by default. Alternatively you can switch tothe corresponding list of control devices by selecting the “Control unit list” entry from the submenu.
color of the mask.
While the vehicle test is being performed, you can follow its progress on the screen as the displayed symbols are updated in real-time.
From this mask, you can if required restart the vehicle test or also call up control unit functions so that you can read out measurements or activate actuating elements. Before you can access a test plan you must first display the fault memory.
* Wait until the vehicle test is completed.
* Click the “Display fault memory” button.
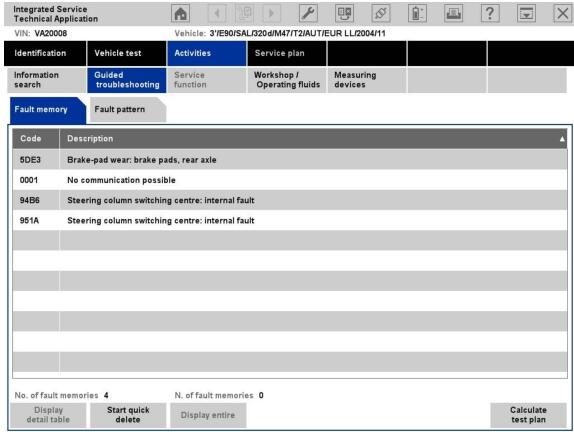
Display fault memory
After the vehicle test, go to the “Fault memory” mask (Chapter 3.4.2.1). The read-out fault codes and the associated description will be listed. From this mask you can calculate a test plan.
* How to calculate a test plan:
* Click the “Test plan” button.
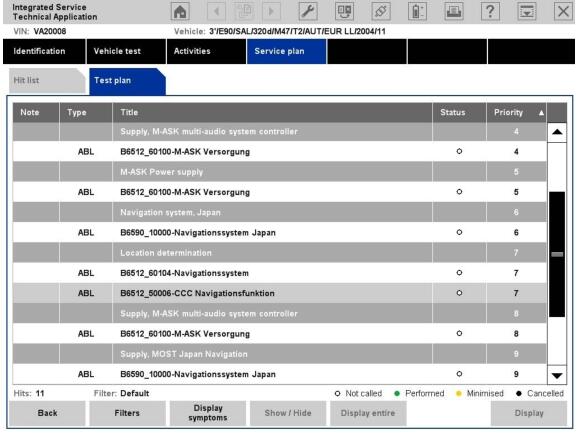
Editing a test plan
The test plan lists the suspected components and functions. The individual suspected components and functions are presented in white lettering against a dark background. Underneath them the appropriate documents and procedures are listed in black lettering against a light background (indicated in the “Type” column with “ABL”). Procedures localize a fault and provide advice on rectifying it.
* Select the required procedure from the test plan.
* Click the “Display” button.
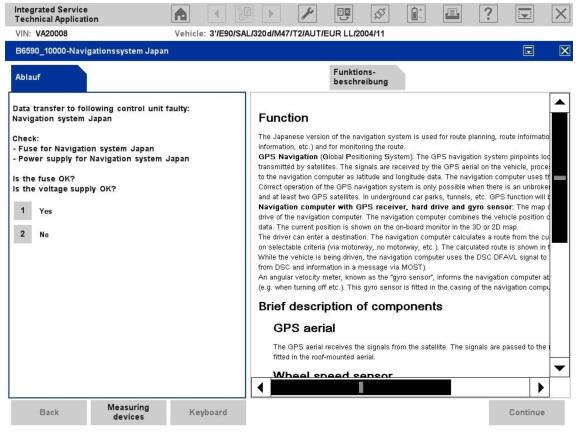
Running a procedure
A procedure (service program) is primarily designed to identify the cause of a fault. Further-more, service functions can be performed via procedures. Information can be displayed within a procedure, as well as measurements read out or entered. Furthermore, queries can be made available via selection screens.
After a procedure has been carried out, additional information will be added to the test plan, if this turns out to be necessary for further fault search or fault rectification. In the test plan, you can select and start another procedure. The following mask gives an example of a question with the options “Yes” and “No”.
After the test plan has been completed, you should execute the “Quick delete” function
Terminating an operation
You can terminate an operation either by:
* Clicking the “X” symbol
* Identification of a new vehicle, or
* Calling up the start mask via the symbol with the same name.
In any case a dialogue will be displayed, showing options on how to terminate the operation. You run the “Start quick delete” function when the guided troubleshooting is completed.
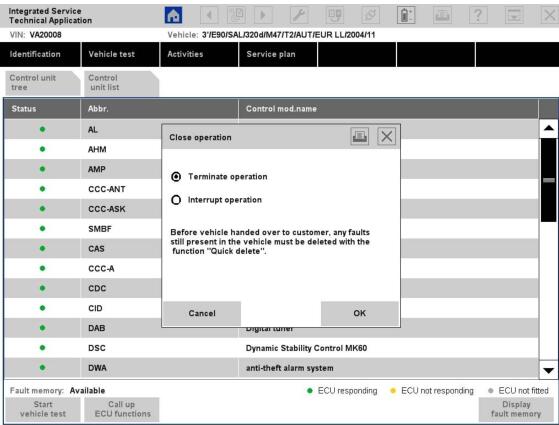
How to terminate the operation:
* Click on the “Start mask” symbol.
* For example, select the “Terminate operation” option.
Leave a Reply