
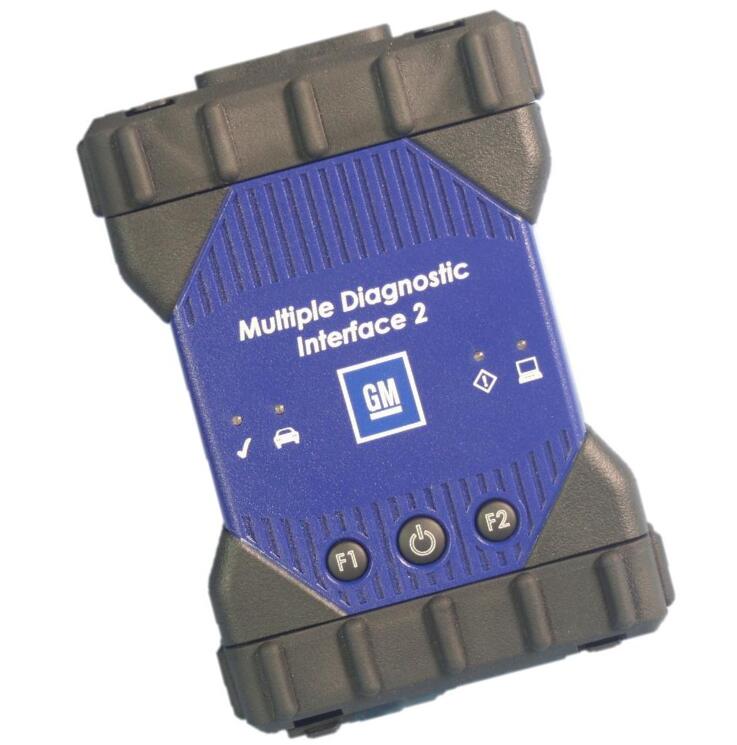
The Multiple Diagnostic Interface 2 (GM MDI 2) User Guide provides a quick reference and overview of the Multiple Diagnostic Interface 2 system.
Everything contained in this manual is based on the latest production information available at the time of publication. The right is reserved to make changes at any time without notice.
No part of this publication may be reproduced, stored in any retrieval system, or transmitted in any form by any means, including but not limited to electronic, mechanical, photocopying, recording, or otherwise, without the prior written permission of GM Customer Care and Aftersales. This includes all text tables, illustrations and charts.
Getting Started
The following sections provide the information needed to begin using the MDI 2 including installing the MDI Manager software, updating the firmware on the device, configuring connection methods, and communicating with the vehicle.
Installing the MDI Manager Software
The MDI Manager software is installed on the PC and provides access to the MDI 2s located on your network. The MDI Manager must be installed on the PC in order to configure, update and run diagnostic applications targeted for the PC. Initially you use the MDI Manager software to set up the configuration of each MDI 2. The MDI Manager is also used to update the firmware on the MDI 2. Use the following procedure to install the MDI Manager software on your PC.
Visit the TIS2Web/GlobalTIS website to determine if a newer version of MDI Manager software is available for your device. If the software on the website is newer than your PC, download the software to your computer.
If you downloaded the software from the website, double-click the downloaded file and follow the instructions on the screen. The InstallShield Wizard starts and guides you through the software installation.
The InstallShield wizard displays a panel indicating that the program is ready to be installed.
Click Install to proceed with the installation. A progress bar shows the status of the installation.
[You can click Cancel if you want to halt the installation process. You are prompted to respond if you are sure you wish to cancel the installation.]
Click Finish to complete the installation. The InstallShield Wizard places the MDI Manager icon on your desktop.
Setting Up the MDI 2 Hardware
Installing Your Wireless Adapter
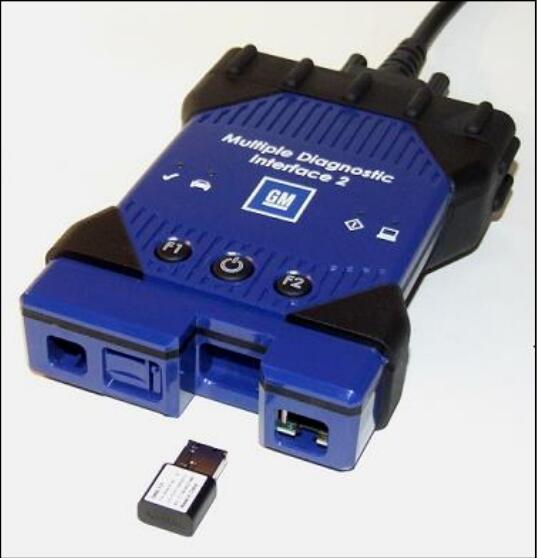
The wireless adapter must be installed into the MDI 2 before you can use the wireless features.
Use the following procedure to install the wireless adapter into your MDI 2.
Ensure power is removed from MDI 2.
Remove the lower boot from the MDI 2.
Install the wireless adapter into the USB port.
Replace the lower boot on the MDI 2.

If you have a wireless GM Scanner MDI 2 kit and are planning to use Point-to-Point wireless communication, you must install the second wireless adapter from your kit into the PC. Use the following procedure to install your wireless adapter into your PC.
Identify a USB 2.0 port on your PC that is accessible. Do not plug wireless adapter into a USB hub.
Install the wireless adapter into the PC USB port. You may have to wait for your PC to install and configure the wireless adapter driver onto your PC.
Reminder: You should use Windows to Safely Eject the wireless adapter before physically removing it from your PC.

Identifying Your MDI 2
The MDI 2 label is located on the back of the MDI 2. The MDI 2 identification number has two parts: a manufacturing code for traceability and a unique serial number. The serial number is used to identify the MDI 2 in the MDI Manager software. You will need to refer to this serial number when you are using MDI Manager to configure the MDI 2 and perform software updates.
Updating the MDI 2 Software
The MDI 2 is shipped from the factory without firmware. Before operating your MDI 2 we recommend visiting the TIS2Web/GlobalTIS website to see if a newer version of the MDI 2 firmware is available for your MDI 2. Your first connection is to the PC where you have installed MDI Manager software. You will need the USB cable to configure your MDI 2 using MDI Manager.
Use the following procedure to update the firmware on your MDI 2
Select the MDI Manager icon from the PC Desktop. Before proceeding to the next step, make sure your MDI 2 is powered on and the MDI 2 is connected to the PC using the USB cable. The MDI 2 will boot in Recovery Mode.(only in factory setup)

When you click on the new MDI 2, the Connect button will change to the Recover button. Your MDI 2 will be displayed without the serial number when initially connected to MDI Manager.
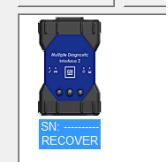
Select the Recover button to start the update process
Select the Start Update button to install firmware on the MDI 2.
Do not unplug the MDI 2 from the PC or remove power from the MDI 2 during the update process. Select OK to continue.
The update process will take about 5 minutes to complete. Once the update process is complete the MDI 2 will automatically reboot. Wait until you hear the beep from the MDI 2
before proceeding to use your MDI 2.
Configuring the MDI 2 Using MDI Manager
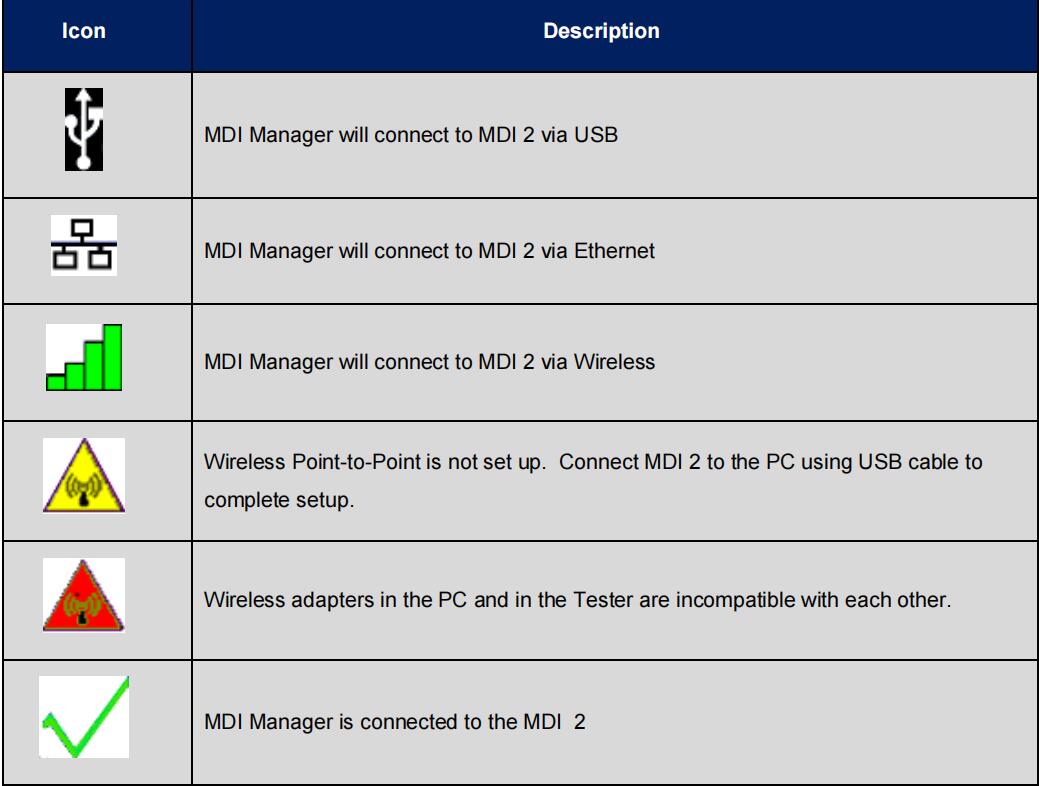
In order to configure a MDI 2 to communicate on your network you must connect the MDI 2, via USB, to a PC running MDI Manager software. The MDI Manager icon displayed on the MDI 2 will inform you of the communication method to be used if the <Connect> button is selected.
Use the following steps to configure your MDI 2
Double-click the MDI Manager icon on your desktop to launch the MDI Manager software.In the MDI Manager software MDI 2 Explorer tab, select the MDI 2 in the window. Click the Show Details button to see details about the selected MDI 2.
Click the Connect button to connect to the selected MDI 2 over USB. The MDI 2 is displayed with a green check mark on your display indicating that your MDI Manager software is in control of that MDI 2. Note: If your MDI 2 is connected to another networked PC, it will still be detected by the MDI Manager but will not be available for selection. [If your MDI 2 is connected via USB to your computer, the MDI Manager functions on all tabs are available; if your MDI 2 is not connected via USB, the functions on the Network Setup and MDI 2 Update tabs are not available.]
Check PC and MDI 2 Software Versions
Typically, the MDI Manager software installed on your PC and the software installed on the MDI
2 must have matching versions in order for the MDI 2 to operate properly. Use the following steps to check your software versions.
1. Connect the MDI 2 to your computer via USB cable.
2. Double-click the MDI Manager icon on your desktop to launch the MDI Manager
3. On the MDI 2 Explorer tab, select your MDI 2 in the window.
4. Click the Show Details button to see the detail view of the selected MDI 2.
The MDI 2 Detailed View window shows the PC S/W Version information for the MDI Manager software and the MDI 2 firmware Version for the MDI 2 as well as available interfaces and IP addresses. If both the MDI Manager software version and the MDI 2 software version match, you can use your MDI 2 with this PC.
Setting Up Wireless Communications
The MDI 2 is capable of communicating on your workshop network over Wireless. The Network Setup tab in the MDI Manager software provides a number of functions used to select and configure the MDI 2 network connection interfaces including wireless access and security settings.
You must be connected to the MDI 2 via USB to access the settings on the Network Setup tab. If you are not connected via USB, the controls on the Network Setup tab are disabled.The MDI 2 supports two methods for wireless communication. With the Access Point Wireless Communication method the MDI 2 connects to your PC through an access point in your workshop. With the Point-to-Point Wireless Communication method the MDI 2 connects to your PC directly using a USB wireless adapter. Each of these methods are described in the following sections.
Enabling Access Point Wireless Communication
Your MDI 2 can be configured for Access Point Wireless Communication. Before starting, you need to know the following:
1. An IP Address and Subnet Mask to assign to your MDI 2 (if your LAN does not automatically assign IP addresses)
2. Wireless communication access point SSID (network name)
3. Wireless security password (encryption key)
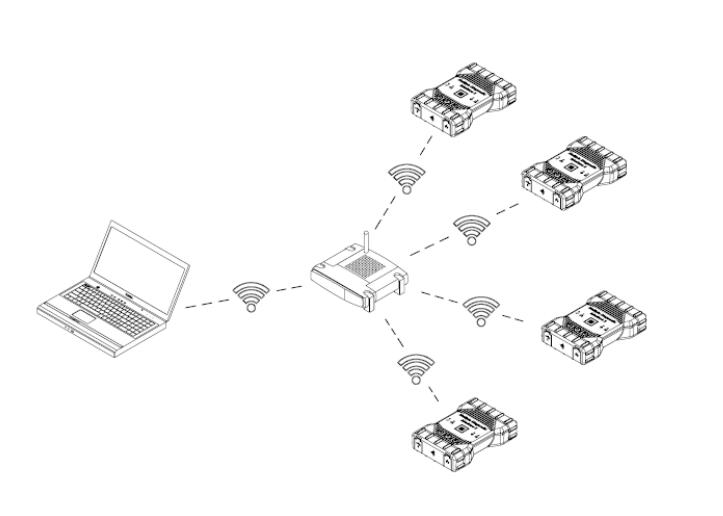
4. The illustration below shows several MDI 2s connected to a single laptop PC using a wireless access point.
Use the following procedure to configure your MDI 2 for wireless communication in your environment. Before modifying the MDI 2 communications interface, contact your IT Administrator.
1. Start the MDI Manager software by clicking on the MDI Manager icon.
2. Plug the MDI 2 into external 12v power.
3. Plug the USB cable into the PC and MDI 2 and allow the MDI 2 to boot completely.
4. Select and Connect to your MDI 2 in the MDI Manager software MDI 2 Explorer tab.
5. Select the Network Setup tab.
6. From the Wireless tab, select the Enable Wireless Interface check box in the Interface Control section. Once you enable the interface, the IP Address Configuration box and the Apply and Cancel buttons become active.
7. Select Obtain an IP address automatically if your LAN automatically assigns IP addresses. Otherwise enter the assigned IP Address and Subnet mask given to you by your IT Administrator.
8. Select Access Point to begin wireless access point configuration.
9. Specify the network name:
a. If your access point uses a hidden SSID or if you are not within range of the access point you will select the Enter Network Name [SSID]: radio button and type the network name.
b. If you are within range of your wireless access point, choose the Select from available network list radio button and then select Refresh to cause the MDI 2 to search for wireless network signals. The detected networks are displayed in the Network Name box.
10. After you have entered the network name, select Configure.
11. Enter the security settings that are required by your network, then select Next.
12. Select Yes to reconfigure your MDI 2, or if you want to start over select No.
13. Choose the Properties tab to verify that the MDI 2 is configured correctly. You can also disconnect the USB cable to verify that the wireless connection is working.
14. Record or print your settings as they are displayed on the Properties tab for future reference.
Enabling Point-to-Point Wireless Communication
Your MDI 2 will initially be configured for Point-to-Point Wireless Communication on the PC you are connected to. Before starting, please verify your MDI 2 kit is the Wireless-Point-to-Point kit 8200171 (Bosch p/n 1699200171) which includes the MDI 2 assembly with two D-Link Wireless 802.11n USB Adapters.
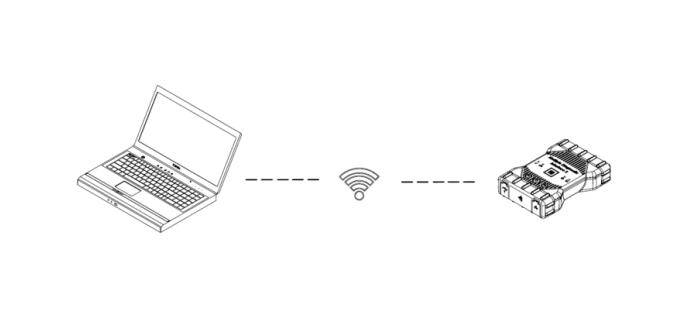
The illustration below shows a single MDI 2 connected to a laptop PC using Point-to-Point Wireless communication.
If you need to re-configure Point-to-Point on your MDI 2, use the following procedure. Note that the steps presented below assume you are running the Windows 7 operating system on your PC. The steps for other versions of the Windows operating system may be slightly different.
1. Insert the Wireless USB adapter in an available USB port on your PC. Do not plug the wireless adapter into a USB hub. Power-on your PC.
2. Connect the MDI 2 to your PC using the USB cable and allow the MDI 2 to boot completely. Do not plug the MDI 2 USB cable into a USB hub.
3. Start the MDI Manager software by double-clicking the icon on the PC desktop.
4. The Point-to-Point connection is automatically configured. Wireless communication will be available when you are powered through the DLC Cable.
If you have the need to reset your Point-to-Point passphrase, you can use the following steps.
The following steps assume you are running the Windows 7 operating system on your PC.
1. On the right-hand side of the Windows Task Bar, click the View Wireless Networks button. A list of the available wireless networks in range of your PC is displayed.
2. Select Open Network and Sharing Center.
3. Select Manage Wireless Networks from the left column.
4. Select Change adapter menu and choose MDI from the list.
5. Remove your stored Point-to-Point network. The name will contain MDI and the last 8 digits of the MDI 2 serial number, (MDIXXXXXXXX).
6. When you reconnect the MDI 2 to the PC using the USB cable, a new passphrase will be established.
Set Factory Default
Selecting the Set Factory Default button on the Network Setup tab reconfigures your MDI 2 to the Point-to-Point communications settings it had when it left the factory. Any software upgrades that have been installed to the MDI 2 are still installed. When the MDI 2 reset is finished, the MDI Manager software displays the MDI 2 Explorer tab. All wireless AP configurations will be lost.
Power On Self-Test (POST)
When you first apply power to a MDI 2 with firmware, the Power On Self-Test (POST) runs. You should observe a sequence of lights and hear the “BEEP’ indicating that the MDI 2 is working properly

If a failure occurs, one long audible beep will be heard and a Test Failure light sequence displays which includes the red Error LED.
Connecting the MDI 2 to a Vehicle
The MDI 2 Vehicle Communication Interface kit contains an external test equipment (ETE) cable that connects the MDI 2 to the vehicle’s SAE J1962 Data Link Connector (DLC).
Refer to the electrical wiring diagram for the vehicle you are testing to determine the location of the DLC on the vehicle.
Connect the 26-pin end of the ETE cable to the top of the MDI 2, then tighten the screws.
Connect the 16-pin end of the ETE cable to the vehicle DLC connector.
Powering the MDI 2
The MDI 2 will be powered by the vehicle’s 12-volt battery.
Leave a Reply